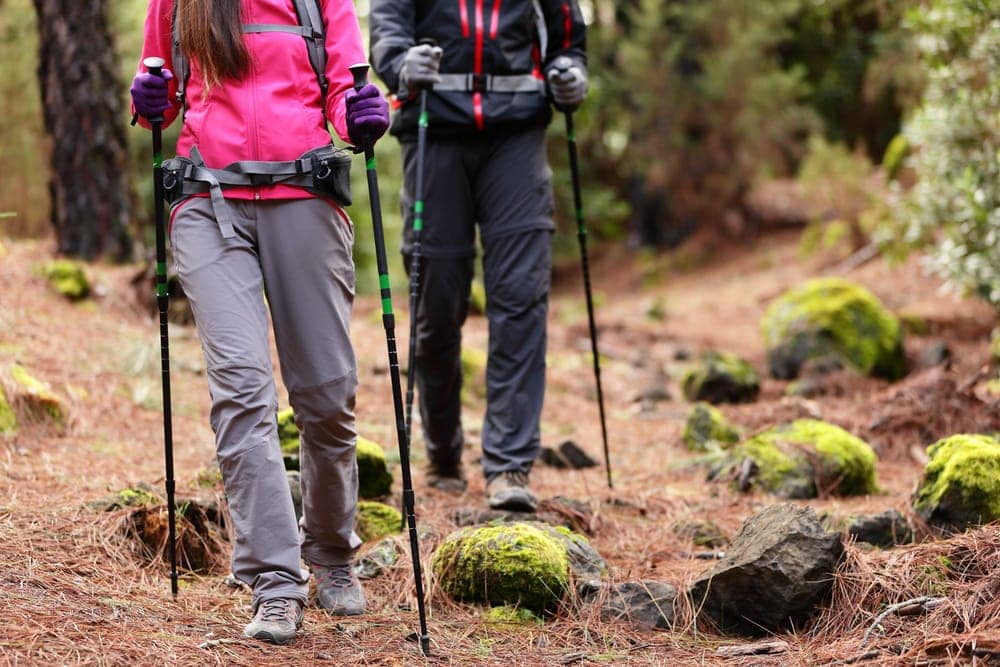
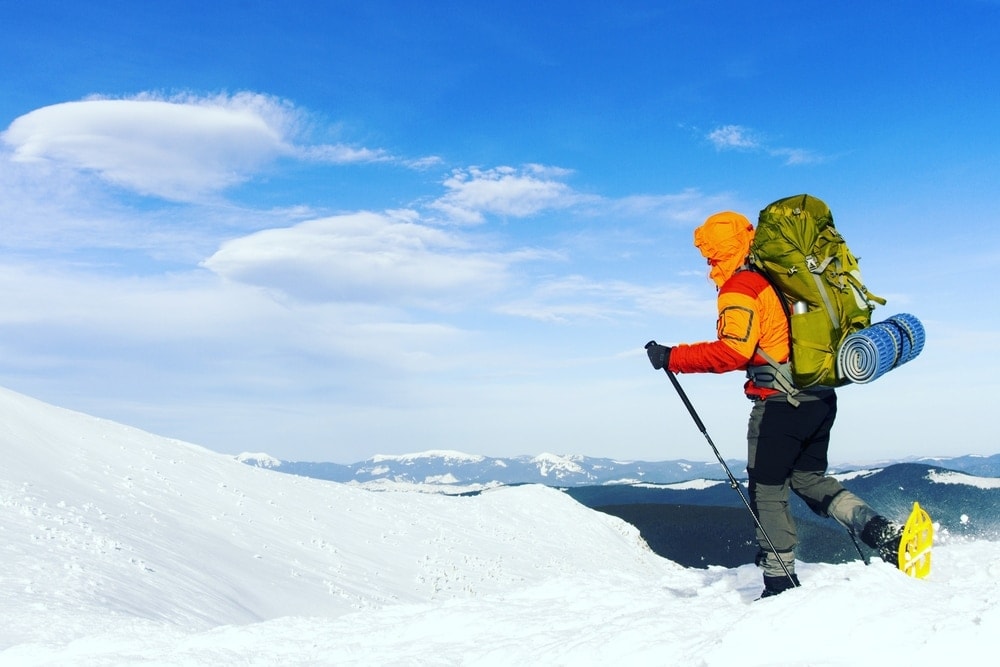
Staying warm and dry in the outdoors is no easy feat. When the wind, rain, and snow conspire against you, being comfortable while camping can be a challenge, to say the least.
Thankfully, there is a way that you can dress to ensure that you stay cozy, regardless of what the conditions bring.
The answer? Layering.
Dressing in layers can make a huge difference in your overall camping experience. In fact, layering is a key skill that all outdoor enthusiasts should know. However, dressing for the outdoors is a skill that takes time to perfect, so it can take some trial and error to streamline your personal layering system.
To speed up the learning process and to ensure that you have all the information you need to need to get outside, here’s our ultimate guide to layering to get you started.
Prefer to skip the trial and error? Our free Hiking Layering Planner turns today’s temperature, wind, rain, and UV into a base-to-shell layering plan in seconds.
What Does It Mean To Dress In Layers?
You probably hear a lot of folks in the outdoor world talking about “layering,” but what exactly does it mean to dress in layers?
Simply put, dressing in layers means that you wear multiple jackets and pants at any given time so that you can regulate your warmth and weather-resistance based on the changing conditions and your personal comfort levels.
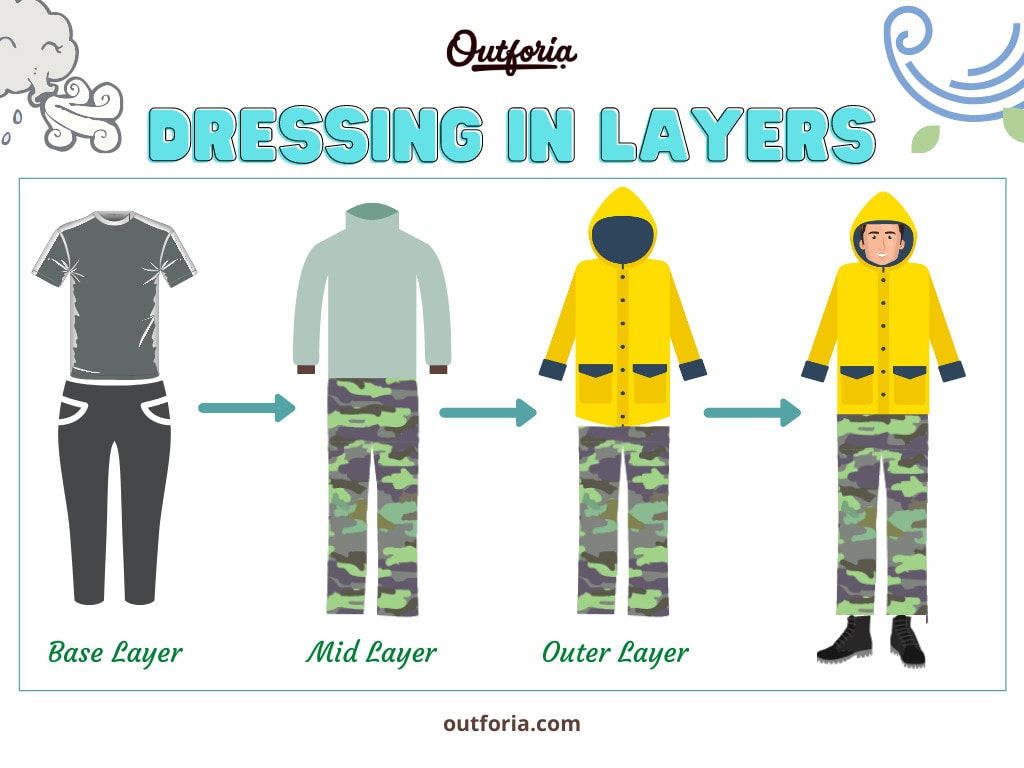
Most layering systems follow a 3 layer approach, which includes the following:
- Base Layer. Your base layer, or your underwear layer, is the bottom of the layering pyramid. It’s designed to wick moisture and sweat off your skin to keep you cool and dry as you hike.
- Mid Layer. As the name suggests, mid-layers are the middle layers in this system. They’re your insulating jackets, like your fleeces and puffies, which are designed to keep you warm.
- Outer Layer. Finally, the outer layer is your waterproof and windproof jacket that provides protection from the elements, most common material are Patagonia’s H2nO and gore-tex.
We’ll go over each of these different layers in more detail in a bit, but understanding the fundamentals of what each layer in the system is meant to do is essential to your camping experience.
Why Is Layering Important?

Dressing in layers while camping is of the utmost importance because it gives you the ability to quickly alter your clothing choices in response to changing weather conditions or increased activity levels.
For example, you’ll probably find that you feel much colder when you’re just sitting around your campsite than you are when you’re making your way up a steep trail. So, instead of having to completely change your outfit before you leave camp each morning, layering allows you to take off a few jackets so that you’re instantly ready for your day of hiking.
Alternatively, if it starts to rain while you’re hiking, dressing in layers makes it easier for you to quickly put on your rain jacket and rain pants without having to change everything that you’re wearing.
As you can see, in a situation with rapidly changing weather conditions like you’ll find outside, dressing in layers gives you the flexibility you need to ensure that you always stay warm and dry.
- You May Also Like: our camping essentials guide
How To Dress In Layers For Camping: A Step By Step Guide
Now that we understand why layer is important, let’s dive into the nitty-gritty of how to dress in layers for camping. In this section, we’ll discuss some of the principles of layering and then give you an in-depth look at the different aspects of each part of the layering system.
Principles Of Layering
On the face of it, layering is a fairly straightforward concept. However, there are a few important principles that everyone ought to keep in mind as they pack for an outdoor adventure. Here’s what you need to know:
- Outer Layers Need To Fit Over Inner Layers. One of the most important things to keep in mind while layering is that your outer jackets, such as your rain jacket, need to fit over all of your inner layers so you can wear all your layers at once if need be. That means that you’ll often need to get a larger rain jacket than you’d normally wear, just in case it’s both cold and rainy.
- Avoid Very Thick Jackets As Mid Layers. Building off of the concept that your jackets all need to fit over each other, it’s generally best to avoid packing very thick fleece or puffy jackets as your mid layers. Although these jackets are nice for walking around town, they are just too thick to make them practical for use within a layering system Indeed, you’ll probably struggle to find a rain jacket that can fit over them.
- Pack More Layers Than You Need. When packing for your camping trip, always plan to bring 2 to 3 more layers than you think you actually need. Conditions can change rapidly, so having extra layers on hand can really have a big impact on your camping experience.
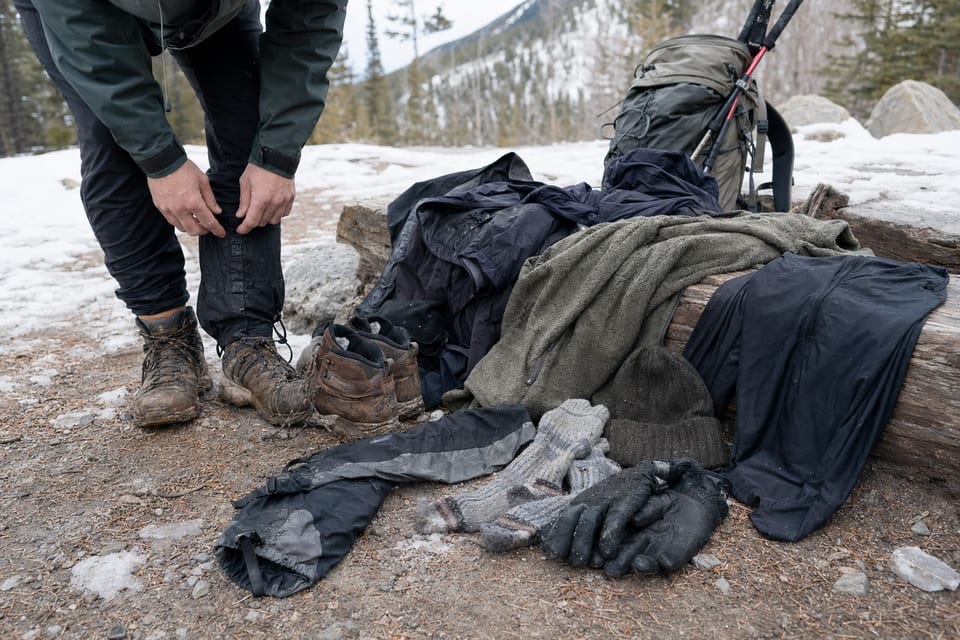
- Don’t Forget Your Lower Body! While we often focus so much on layering for the upper body (e.g., fleece jackets, puffy jackets, and rain jackets), we sometimes neglect the importance of layering for the lower body. Sure, keeping your core warm is your chief concern, but in very cold conditions, you’ll certainly need to consider what you’ll wear on your lower body to protect you from the frigid temperatures.
The Layering System
The key to dressing in layers is to think of it as a system. Like any good system, layering only works if each item of clothing you wear serves a particular purpose and if each of these layers works well with each other.
So, as we discuss each of the aspects of the layering system in more detail in this section, try to imagine what items of clothing you might already have in your gear closet that would fit well within each category.
If you need a bit of inspiration for what gear you might need to bring on your adventures, check out our the camping gear list we use for more guidance!
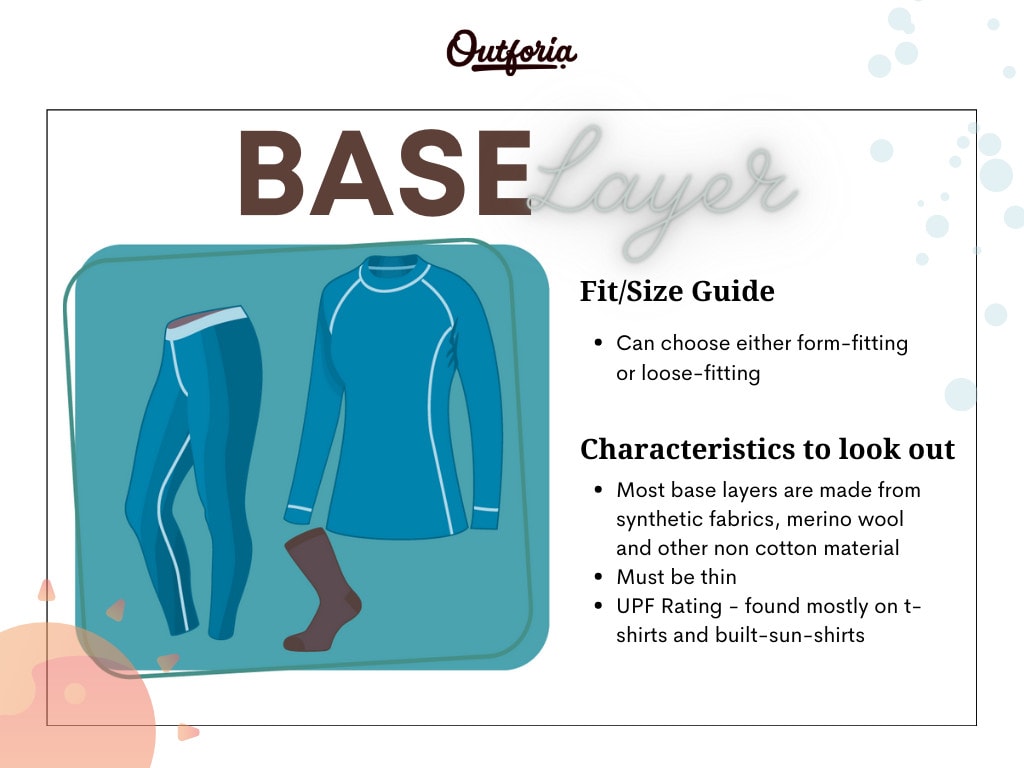
Layer 1: Base Layer
The primary purpose of a base layer is to wick away moisture from your skin. As your primary source of moisture management on the trail, base layers soak up sweat and then allow it to evaporate, keeping you cool and dry, regardless of the temperatures outside.
Types Of Base Layers
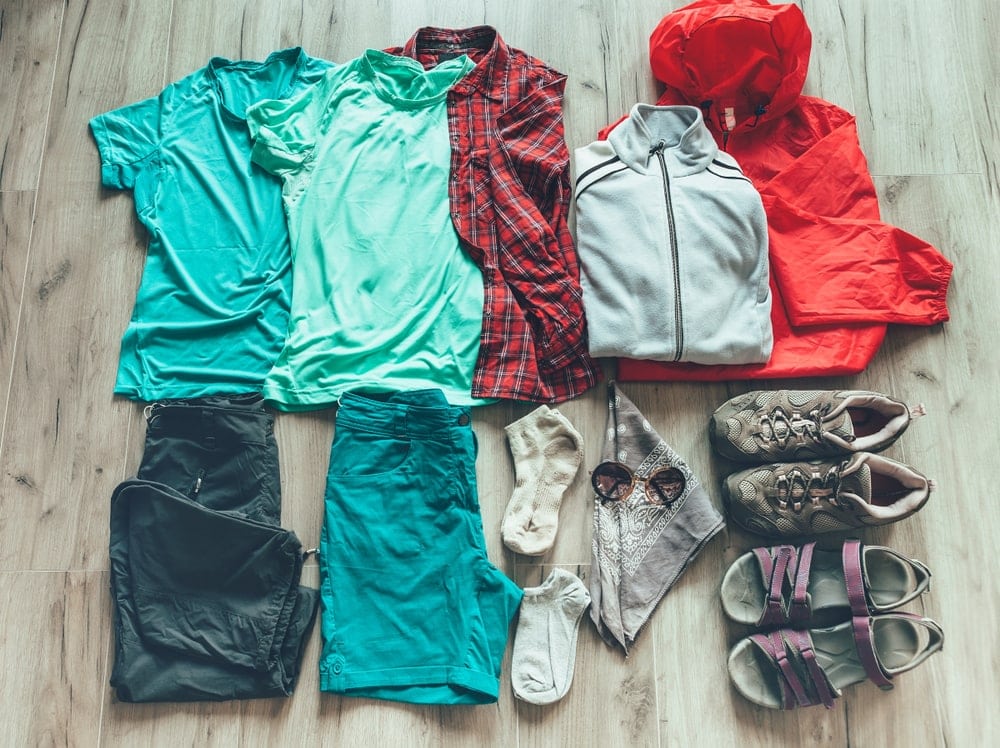
Base layers come in a wide range of different types and styles, each of which is designed for use in a specific type of environment. Some types of base layers you might encounter include:
- T-shirts
- Long sleeve shirts
- Sun shirts
- Lightweight 1/4 zip pullovers
- Long underwear pants
Base Layer Key Characteristics
As you can see, there are many different types of base layers out there, but they all generally share a few key traits, such as:
- Non-Cotton Materials. You will rarely, if ever, find a purpose-built base layer that’s made from cotton. That’s because cotton absorbs a lot of moisture but actually makes you colder when it’s wet – something that’s not exactly great while camping in cold environments. Therefore, most base layers are made from synthetic fabrics, merino wool, or other non-cotton materials.
- Relatively Thin. Although base layers do come in a range of thicknesses, from ‘ultra lightweight’ to ‘expedition weight’, you’ll generally find that most base layers are made to be quite thin. This is because the primary purpose of a base layer is to wick moisture, not to keep you warm.
- UPF Ratings. Many base layers designed for use in the summer actually boast UPF ratings, which means that they offer some protection from the sun’s rays. You’ll find these ratings mostly on T-shirts and purpose-built sun-shirts, so keep a lookout for them if you’re shopping for summer camping base layers.
Base Layer Sizing & Fit
Finally, as far as fit goes, you actually have quite a bit of leeway in deciding how tightly or loosely fitting you like your base layers. While some campers prefer more form-fitting baselayers, others find that a loose-fitting t-shirt is more comfortable, especially during the summer months.
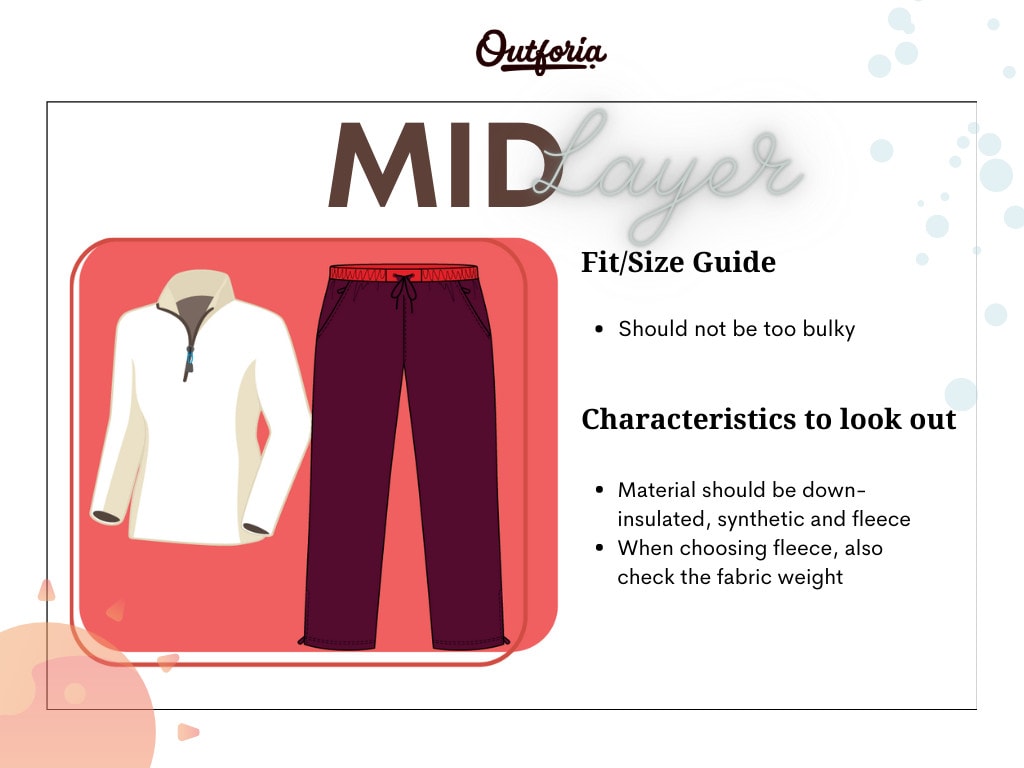
Layer 2: Mid Layer
While base layers are designed to wick sweat away from your body, mid layers are made to keep you warm. In other words, mid layers are your insulating layers, so they’re what you use to trap in body heat to protect you from the frigid cold temperatures outside.
Types of Mid Layers
Unlike base layers, which really run the gamut in terms of the different types of clothing available to you, there are really just 3 types of mid layers: insulated jackets, insulated pants, and vests.
Insulated jackets, which include fleece, synthetic, and down-filled models, are usually your go-to layers for staying warm in the outdoors.
Vests, on the other hand, can be a useful addition to any layering system. While they’re generally not warm enough to use on their own in the outdoors, a vest can be a light, packable option for extra insulation on particularly chilly nights.
Finally, we have insulated pants, which are really only popular while winter camping. These insulated pants can be made from fleece, down, or synthetic fill and they’re super cozy for use in frosty environments.
Mid Layer Key Characteristics
Since the primary purpose of a mid layer is to keep you warm, the type of insulation that a mid layer uses (whether that’s a jacket or a vest) is of the utmost importance. Here are some of the different insulation options you might encounter while building your layering system:
- Down. Down insulation is made from the down plumes of ducks and geese. These plumes are pricey, but they offer an exceptional warmth to weight ratio, which makes them ideal for light and fast missions into the mountains. But, down doesn’t offer any insulating value when wet so it’s less ideal for use in wet locales.
- Synthetic. Unlike down, which is a natural material, synthetic insulation is actually a collection of very thin nylon and polyester fibers. These fibers are then bunched together in order to mimic the insulating qualities of down. In general, synthetic insulation is more affordable, though it’s generally heavier and bulkier than down. That being said, synthetic fill can keep you warm when it’s wet.
- Fleece. There are actually many kinds of fleece out there, so the best way to decide which is best for your needs is to look at the fabric weight. Most companies market their fleece jackets using the Polartec scale (i.e., 100, 200, or 300), with higher numbers indicating thicker fabrics and more warmth. The main benefits of fleece are that it’s affordable, breathable and can keep you warm when wet. However, it tends to be heavy, bulky, and not very wind-resistant.
Mid Layer Sizing & Fit
Since your mid layers are sandwiched between your base layers and outer layers, sizing and fit are very important.
As we’ve mentioned previously, it’s important that your mid layers aren’t too bulky, or you’ll have a hard time fitting them under your outer layers.
At the same time, if you plan on wearing multiple mid layers, you’ll need to figure out what order you want to layer them in, so you can ensure that all your jackets fit over each other without limiting your range of motion on the trail.
Layer 3: Outer Layer
Aptly named, your outer layer (a.k.a. shell layer) is, well, your outer jacket or outer layer of pants. Outer layers, like rain pants and rain jackets, are designed to protect you from the wind and the rain, so they’re your primary line of defense against the elements.
Depending on the conditions you actually expect to face on your adventures, your outer layer might spend a lot of time in your backpack. But, it’s important to have a shell layer ready to go at all times if the weather turns sour.
Types of Outer Layers
In general, the vast majority of campers use rain jackets and rain pants for their outer layers. That’s because rain jackets and rain pants provide the best protection from the wind and the rain, so they’re ideal for use in most wet environments.
However, you may find that a soft shell jacket, a wind jacket, or a pair of softshell hiking pants might be more appropriate for the conditions you’ll face. While soft shell fabrics aren’t usually waterproof (they’re generally water-resistant), they’re much more breathable, which makes them great for light rain or general hiking purposes in nice weather.
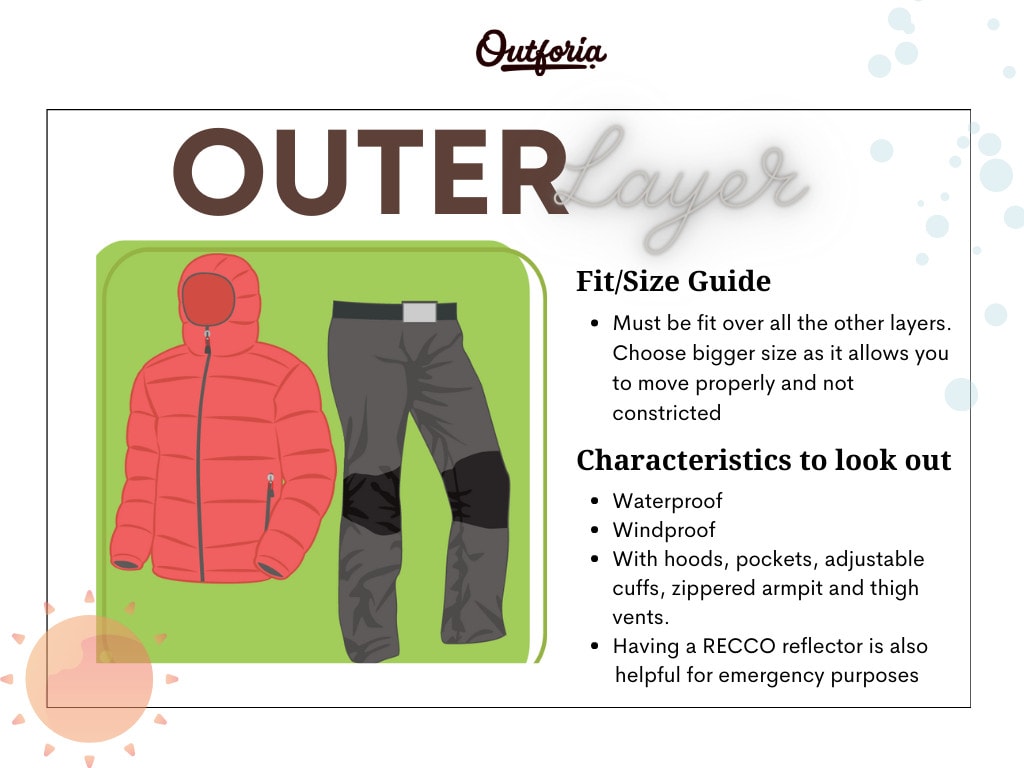
Outer Layer Key Characteristics
Nearly all outer layers designed for use while hiking and camping will be waterproof and windproof. These jackets almost always use some sort of waterproof breathable membrane, like H2NO or Gore-Tex, which can provide ample weather-resistance while still allowing sweat to evaporate.
Other useful features you might find on an outer layer include:
- Hood. Protects your head from the wind and the rain. Some helmets are designed to go over a climbing helmet and others are not.
- Pockets. For on-the-fly gear storage on the trail. Many different shapes, sizes, and configurations are available.
- Adjustable Cuffs. To seal out precipitation and moisture in foul conditions.
- Zippered Armpit Vents. Allows for increased breathability while hiking in humid environments.
- Zippered Thigh Vents. Provides added ventilation for your rain pants in hot, humid, and rainy locales.
- RECCO Reflectors. Lightweight reflectors that are sewn into some winter gear to help rescuers find you after an avalanche.
Outer Layer Sizing & Fit
Outer layers have a tough job because they need to be able to fit over all of your other layers, just in case you find yourself in a cold and wet environment.
As a result, it’s generally best to get a rain jacket that’s a bit bigger than you think you need so that it doesn’t feel constricting when you put it on over your base layers and mid layers.
The same is true for rain pants, but keep in mind that you’ll usually only put your rain pants over your hiking pants and maybe a set of base layers, so don’t size your pants too large.
How To Dress In Layers: A Practical Guide
At this point, you have a solid theoretical understanding of how to layer for camping and hiking. However, putting all of this information together into a system that works for you while you’re outside can be tricky.
To help you out, this section will offer up an example of a layering system that you might use while summer or winter camping.
Of course, what system you use will depend on your personal gear inventory and the conditions you face. But, we hope that this information serves as a helpful starting point as you plan.
How To Dress In Layers For Summer Camping
Summer camping can involve super hot conditions in the desert or breezy, rainy, and moderate conditions in the mountains. So, there’s actually no one-size-fits-all solution to layering for summer adventures.
That being said, layering for summer camping starts with identifying the conditions you’ll face and creating a clothing system that directly addresses those needs. You may find that you don’t really need base layer pants or rain pants in the desert, but that these are a must in the alpine.
With that in mind here are some example summertime layering systems to use as inspiration for your trips.
Hot & Sunny Camping
- Base Layer: Merino or synthetic T-shirt with a UPF sunshirt and a pair of breathable hiking pants.
- Mid Layer: Lightweight puffy jacket and fleece for staying warm on chilly nights.
- Outer Layer: Wind jacket or a lightweight rain jacket for breezy days. Rain pants optional based on the climate.
Cool, Wet & Breezy Camping
- Base Layer: Merino or synthetic T-shirt or long-sleeve wicking shirt with breathable softshell hiking pants. Baselayer pants optional based on the conditions.
- Mid Layer: 2 to 3 midweight puffy and fleece jackets for warmth during the day and night. Consider a vest if you tend to get cold.
- Outer Layer: Rain jacket and rain pants for foul weather. Wind jackets and soft shell jackets optional, but helpful.
How To Dress In Layers For Winter Camping
Layering for winter camping is challenging but incredibly important because your clothing is your primary line of defense against the cold and the snow. While the number of layers you pack and wear while winter camping will depend greatly on the temperatures you expect to face, the principles of layering are the same.
Here’s how you dress in layers for winter camping:
- Base Layer: Merino or synthetic long-sleeve shirts and long underwear. Opt for base layers that are labeled as ‘mid-weight’ or ‘expedition weight’ as these provide a bit of warmth in addition to their moisture-wicking abilities.
- Mid Layers: Your mid-layers choices will vary a lot depending on the temperature. Bring at least a fleece jacket and 1 to 2 puffy jackets for all-day warmth. Also, be sure to pack 2 to 3 extra jackets as well as puffy or fleece pants, just in case the temperatures are colder than you expect.
- Outer Layers. Winter camping requires that you bring 2 sets of outer layers: 1 set that can keep you dry and the other for use in extreme cold. Bring rain pants and a rain jacket to keep you dry and an extra-large puffy for when the mercury drops. Additionally, don’t forget to pack plenty of hats and gloves to keep you warm and dry.
Need more guidance on layering for the winter? Check out our ultimate guide to winter camping for more essential tips and tricks.
- You May Also Like: Diversify your Closet with these 10 Brands Like Patagonia To Shop At For Your Outdoor Adventures
Layering Is Key
The most important step you can take to improve your camping experience is to learn how to layer properly. Layering is a skill that takes time to develop, but you now have all the knowledge you need to craft your own personal layering system. Happy camping!
Related articles