Starting a friction fire is not as simple as rubbing a few sticks together, as you might have seen in the movies. Instead, it takes a quality collection of natural materials, a careful technique, and lots of practice.
Here’s an in-depth guide on how to start a fire with sticks and the tools you’ll need to do it.
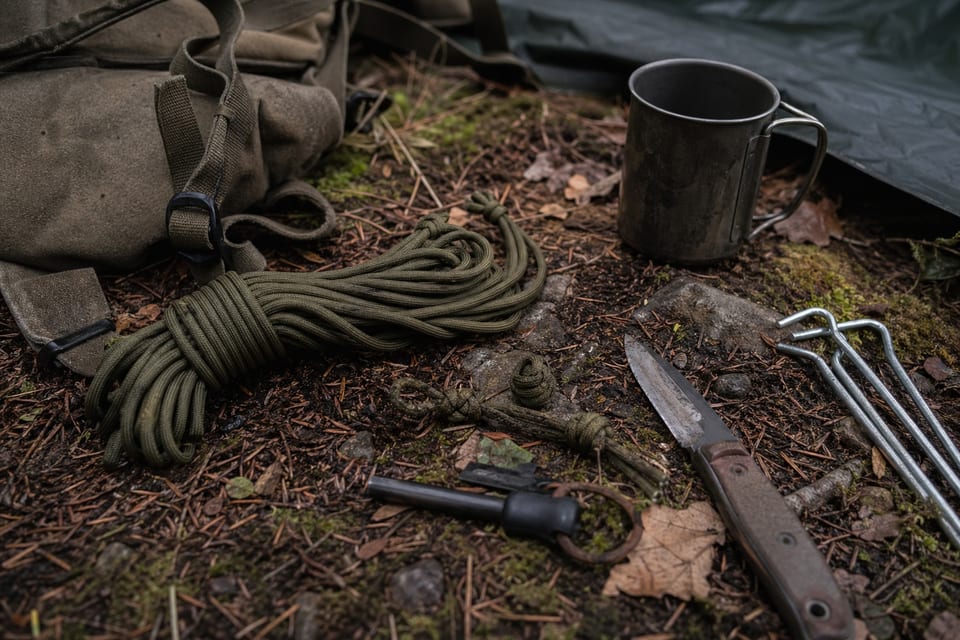
Preparing Your Fire Kit
The elements of your fire kit are critical to your success. No matter how much you practice, you probably won’t be able to overcome poor-quality equipment. You’ll need:
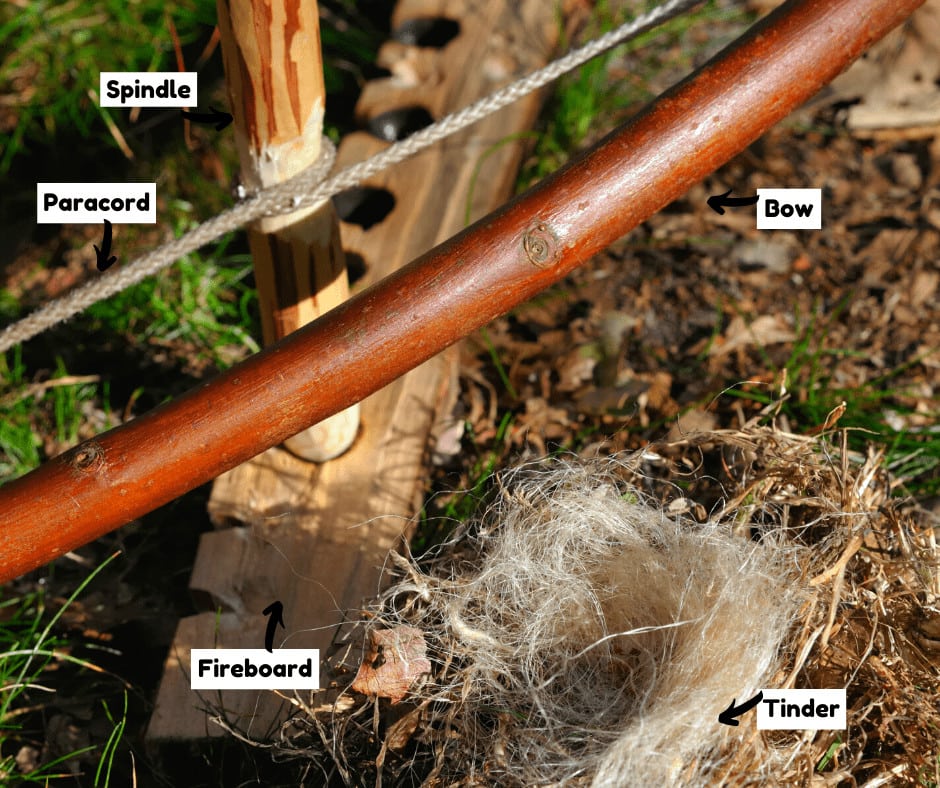
- A bow
- Paracord for the bowstring
- Spindle
- Fireboard
- Kindling/Tinder
Here are some tips to help you put together the perfect kit for learning how to start a fire with sticks.
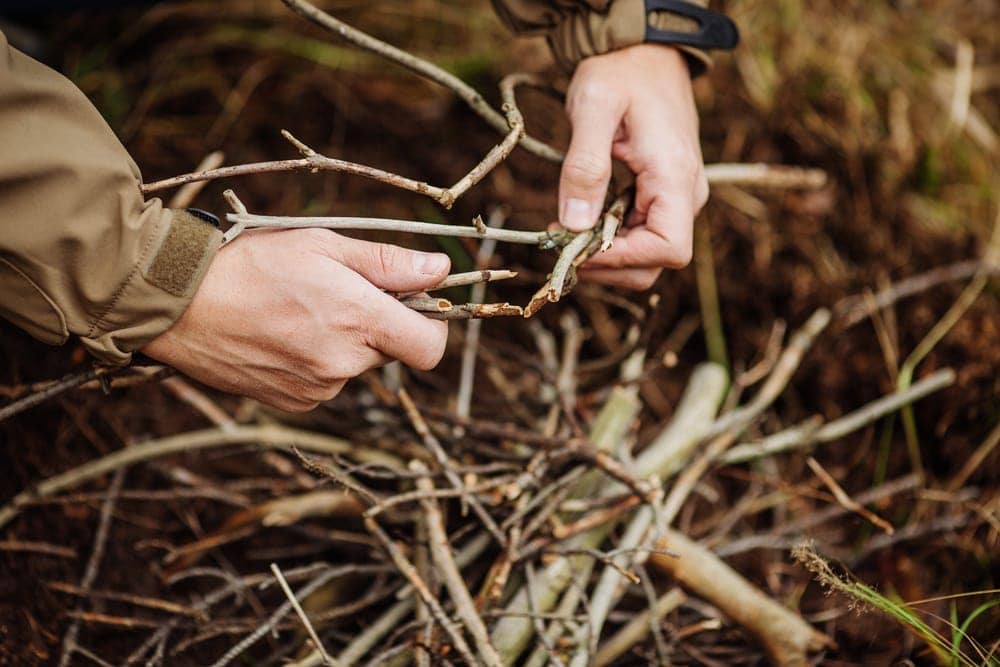
1. Choosing Your Bow
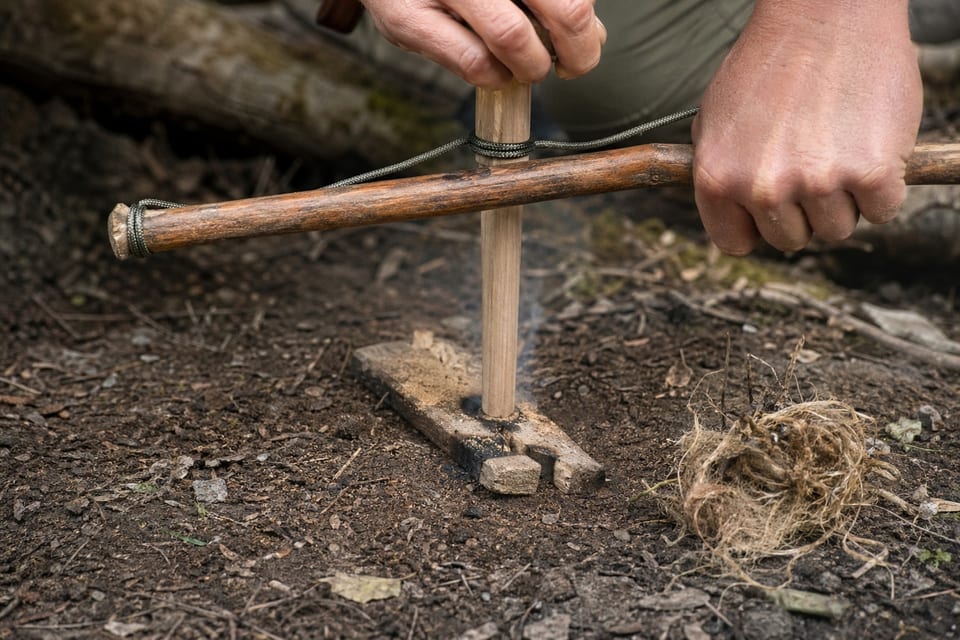
One of the methods for making fire with sticks is the bow drill technique. This one is my personal favorite – maybe because it’s the one I’m best at. I mention this because not all approaches to starting fires with sticks will require a fire bow, as you’ll see later.
Many different types of wood are suitable for your fire bow. Honestly, it all comes down to personal preference and accessibility. For instance, you won’t be able to find willow wood in specific environments, just as a juniper bow (what I and my backpacking buds affectionately refer to as a “juni-bow”) won’t be available everywhere either.
Speaking of juniper and willow, these are by far the most popular woods to use for forming your bow. They’re both nice and sturdy, but the willow is more flexible. Additionally, it’s just far prettier and has a nice shine, even after being fire-hardened, if you care about the aesthetics of your kit at all.
Most people suggest using dead wood when you’re putting together your fire kit. They’re absolutely right. Additionally, I know this is a bit taboo to say, but many others, like myself, have been trained to make friction fires with tools taken from live wood.
To this point, here are some things to consider:
- Harvesting live wood is bound to get you a sturdier bow. If you’re not careful when assembling your kit and you lean toward dead wood, you might pick up a branch that’s far too dried out and decayed. It will have lost much of its structural integrity, making it very weak. It might snap due to excessive dryness, depending on its thickness.
- Dead wood has no flex. Flexibility is integral to a good fire bow. This is because you’ll need to keep the bowstring taught, yet the wood should provide the slightest bit of give when you go to position your spindle. (This will require pulling on the string a bit.) As mentioned above, dead wood is devoid of moisture and will likely snap.
Still, with all this said, harvesting live wood is a tricky business. You’ve got to be sure you have permission to go hacking at trees on a plot of land. If you’re unsure, look for a recently dead or broken branch. This will be perfectly balanced between dead wood’s dryness and a live branch’s flex and moisture.
When choosing your branch, I recommend looking for a slightly curved branch with a “Y”-shaped notch at the top. That’ll be easier for you to mount your bowstring to. You won’t have to constantly fiddle with it to keep it in place as you’re bowing, as the notch will prevent it from sliding down.
Lastly, your bow should be the length of your forearm. Before you start cutting anything, dead or alive, place your arm up against it to get a sense of its size. A bow too long will be difficult to keep parallel to the ground as you bow, whereas one that’s too short will make it far too hard to get good, long, balanced strokes with.
2. Selecting a Spindle
Like the fire bow, there are plenty of woods that will work well for making your spindle. However, this piece of equipment is a bit more challenging to pin down than the bow. Your spindle and board should be soft. Excessive hardness is a chore to work with. It’ll be far too challenging to get a coal going, especially for a beginner.
If possible, I suggest seeking out sagebrush for your spindle. It is an all-around perfect contender for this part of your kit – strong, soft enough to get the right amount of friction, and always the perfect diameter. However, if there are no sage bushes around, the next best thing is a juni spindle.
I’ve only ever used one of these once, and it was okay. It might be a bit strange for beginners to use juni on juni, so just keep that in mind.
When you’re “shopping” around for your spindle, keep an eye out for the straightest portion of wood possible. This can be tricky to spot, as sagebrushes are commonly twisted and gnarly-shaped. You’ll have to look very carefully and closely.
I’ve also harvested from live wood for this piece of equipment too. Yet, most people prefer to use dead wood for their spindle. Just be careful about looking for dead wood when choosing your spindle, specifically from sagebrush. This wood tends to get quite brittle when it decays, and that’d be a pain for anyone to work with, no matter their experience level.
Your spindle’s length will vary, depending on the technique you’re using. This also varies with personal style and preference. I personally don’t like working with a spindle that’s any longer than 6″ for bow drill. However, the U.S. Scouting Service Project recommends 12-15″ and a diameter of ¾”.
Hand drill spindles will naturally be much longer, as your hands will need to travel up and down the wood to keep your rhythm consistent. These are best at 16-24″ long and roughly the thickness of your pinky finger.
The spindle’s length is more important than you might assume. For example, if it’s too long for bow drill, it’s likely to snap due to how it’s held in the bowstring and the motion of bowing. Too short for hand drill, and you’ll have to keep starting and stopping, which will kill your chances of making a good coal.
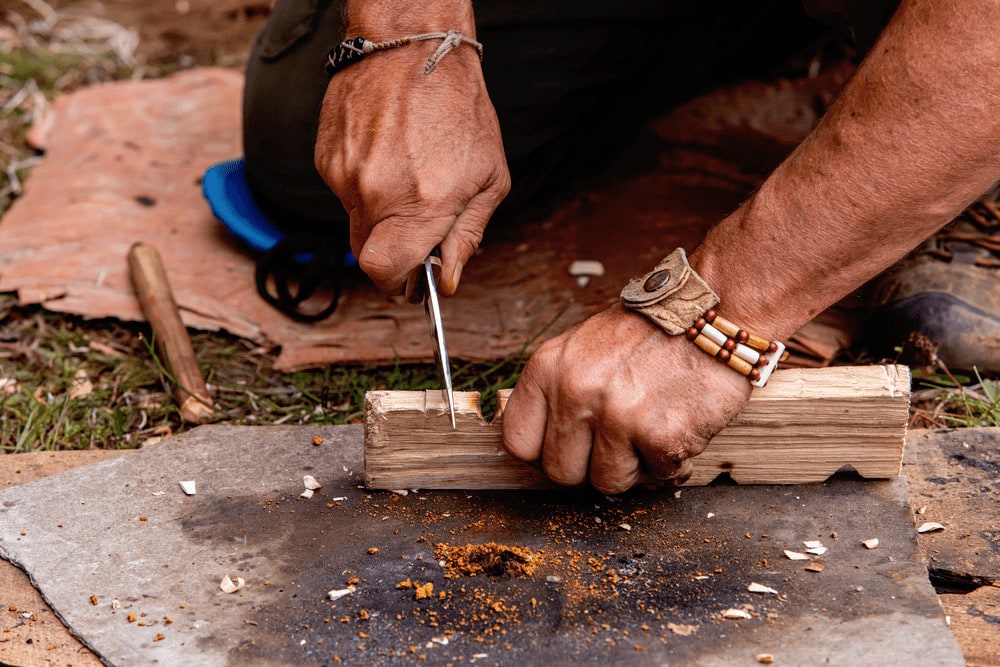
How to Shape Your Spindle
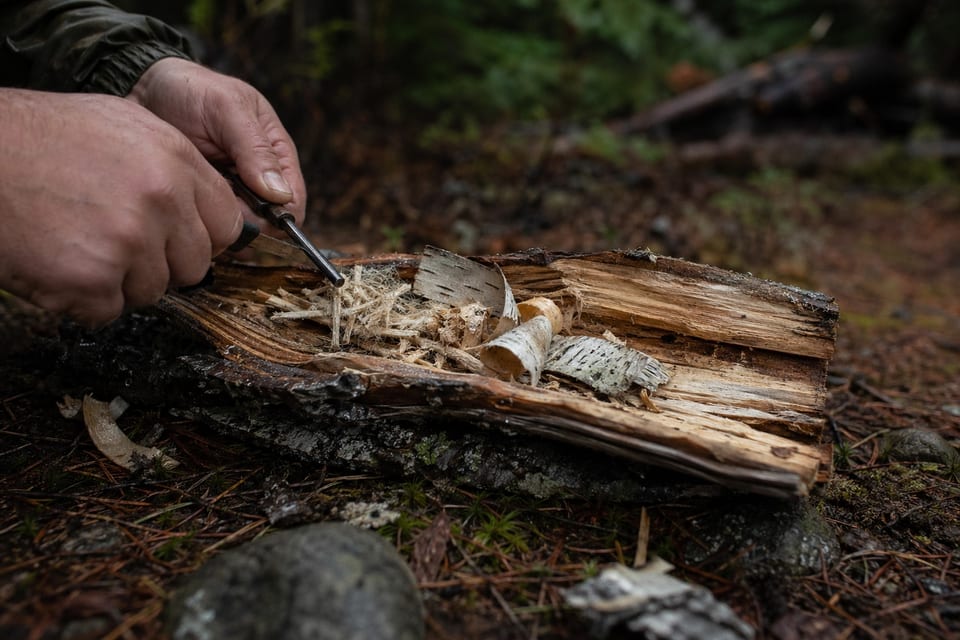
After you’ve chosen your spindle, you’ll need to prepare it for use. The first thing you need to do is remove the bark from the exterior. This is a necessity! Leaving this plant material on will just increase the spindle’s chances of getting caught in the bowstring.
That’ll break up your flow and ruin the heat you’ve built up while making a coal. Plus, spindles without bark are just easier and more comfortable to handle.
Next, you need to shape it. This step is straightforward. You can shape your spindle by either carving it down with a knife or gradually shaving it down by rubbing it up against a rock or another hard surface. Your goal is to get your spindle to look like a pencil that’s partially sharpened on both ends.
With that said, your goal is not to make your spindle sharp. Instead, you need a rounded point to fit into the hole on your fireboard and your palm rock. Your “palm rock” is a stone, a block of wood, or another material you hold in the palm of your non-bowing hand to keep the spindle down and in the hole while you’re drilling.
The spindle needs to be more flattened and round on the end that’s going into the palm rock. Otherwise, it’ll wobble, and you’ll likely build up too much heat between the palm rock’s and spindle’s surface.
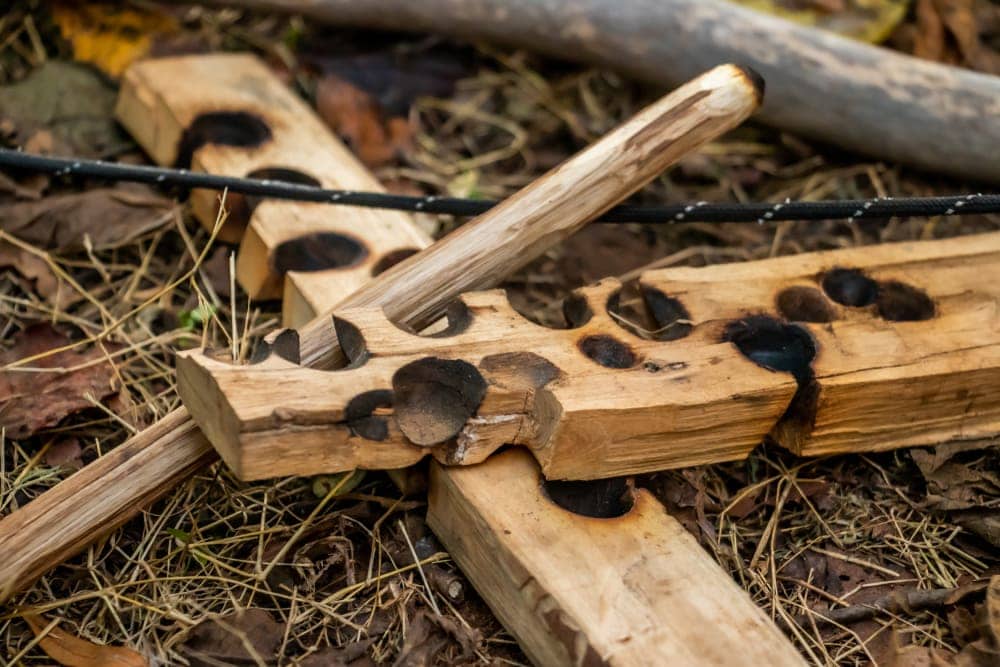
3. Getting a Fireboard
The fireboard is arguably where dryness is the most important. Too much moisture in the board will result in lots of smoke without any punk. This means no coal, and therefore, no fire. Like the other components of your kit, the fireboard can be made from lots of different wood types.
Here’s a look at the hardness ratings of common tree species to give you an idea of what will and won’t work for you:
- Ponderosa pine: 460
- Incense-cedar: 470
- Red alder: 590
- Western juniper: 626
- Coastal Douglas-fir: 710
- Eastern redcedar: 900
- Northern red oak: 1290
Recommendations for board thickness vary widely, ranging from ¼-¾” or thicker. You might have a better experience if you stay away from the lower end of this spectrum. This is because thin boards can split, and the holes will blow out significantly faster than a thicker alternative.
(This means that you’ll reach the bottom of the notch by drilling too deeply into the hole. This is bound to happen after a while of using the same hole on the board, but it shouldn’t happen too early on. A thicker board will get you more fires.)
Now, note that the Ponderosa pine is the softest. It may seem like this is a go-to choice, but truthfully, I recommend against it. This is because pine wood typically has sap on it or underneath the bark. Sap will cool down the punk and work against the flame you’re trying to create, so it’s best to steer clear of these types of wood.
How to Notch Your Fireboard
The notch (a deep cut) you put in your fireboard is critical to your success in making a solid coal. Further, this part of the board could be a make or break for each fire you set out to make. I’ve seen too many people notch too deeply into their hole only to blow it out when they first drill into the board. It’s a frustrating and time-consuming mistake to make.
“Blowing out” a hole in your fireboard means that the hole is no longer stable. It can no longer secure your spindle while you bow, leaving it to wobble intensely while you’re trying to bow or hand drill. A blown-out hole cannot typically make a good coal. But, if you’re a pro, you can make it work. (It takes a while to get to that point, though.)
So, here’s my advice. First, you can either use a sharp rock (a “notch rock,” I call it) or a knife. Knives are faster, but with the right stone, it can’t take too much more time. If you’re lucky, you’ll find a nice piece of obsidian. This is a very strong, sharp stone material that rivals a knife if you know how to use it.
You can use your notch rock to make the hole for your spindle and the “V” for the punk to fall down into. (It will look like a “V” when you’re looking straight down at the board.) I recommend drilling the hole first. This reduces your chances of blowing it out. Make it very shallow.
Going too deep before notching is another easy way to damage the hole. Plus, a hole that’s too deep won’t allow the punk to fall out. Instead, it’ll just build up at the base of the spindle and you’ll crush your coal as you bow.
Once the hole is a good enough size to secure the bottom of the spindle, you can get started on the notch. Cut the shape of a V into the side of the board. The angles should be slightly less than 45 degrees and the point of the V should reach just before the hole’s center. Do not notch all the way to the center of the hole! This could blow out the hole immediately.
Once your notch is complete, you can either drill the hole down just a bit more or go straight into bowing. You’ll know when the hole is blown out
4. Gathering Kindling (Tinder)
Kindling, also known as “tinder,” is the easiest part of your kit to collect, especially if you’re on the west coast. Woodlands in the western United States tend to gather lots of dried plant material, such as pine needles and peeled bark, at the base of the trees. You can find this stuff in Midwestern and Northern forests, too. However, there tends to be more of it in the West.
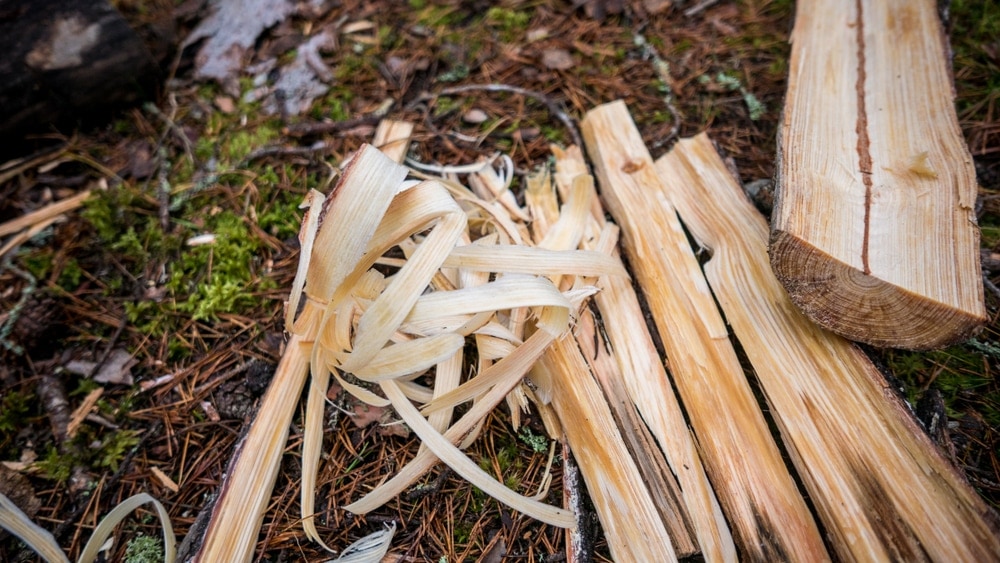
On that note, another reason why juniper trees are a favorite for making fire kits is that they provide usable bark, too. Many people use this bark to make fire “nests.” This means you wrap the peeled bark in a tight circle, typically a few inches in diameter, and place shreds of the same bark and the plant material mentioned earlier inside.
This insulates the coal you’re eventually going to put inside. The nest’s sides prevent excessive wind from blowing the coal, allowing only your breath to do the work. This way, you can work at your own pace without worrying that you’ll drop your coal or accidentally blow it out.
Remember that you’ll also need kindling for your main fire too. After all, the coal has to go somewhere after you blow it into flame. Small, skinny twigs are perfect for building up a strong flame. You can place these on top of your nest once you’ve made a flame, gradually placing larger sticks on top. Once it reaches an adequate size, add logs.
You may also like: No Dry Wood? No Problem: How To Start A Fire With Wet Wood
A Note on Leave No Trace Principles
A few times so far, I’ve mentioned my experience in using live wood to put certain parts of my fire kit together. I want to re-emphasize that you should be extremely careful and considerate if you choose to follow suit.
The best way to adhere to Leave No Trace principles when assembling your kit is to only use wood that you’ve found lying on the ground. Most of the time, this will be dead wood. However, if you do prefer going with live branches, it’s best to find material that’s already been damaged somehow or has fallen to the ground.
Plus, the following land criteria will allow you to harvest live wood freely:
- You have special permission to harvest fire kit materials from the trees on the land.
- The area has no policies against harvesting the plant species.
- You own the plot of land.
You May Also Like: Staying Warm In Winter: How To Keep A Fire Going As Long As You Want!
How to Start a Fire with Sticks: 3 Methods
1. Bow Drill
Depending on who you are and your physicality, this may be the easiest method for how to start a fire with sticks. Personally, I find it to be the most comfortable and most intuitive to learn.
That said, everyone is different in their fire-making style and specific techniques. Still, these general steps will guide you toward your first coal. Here’s a step-by-step walkthrough on my favorite primitive fire-making method.
What You’ll Need for Bow Drill
Your fire-making skills are only as good as your kit. Here’s what your bow drill fire kit should look like:
- Fireboard
- Fire bow
- At least two spindles
- Palm rock
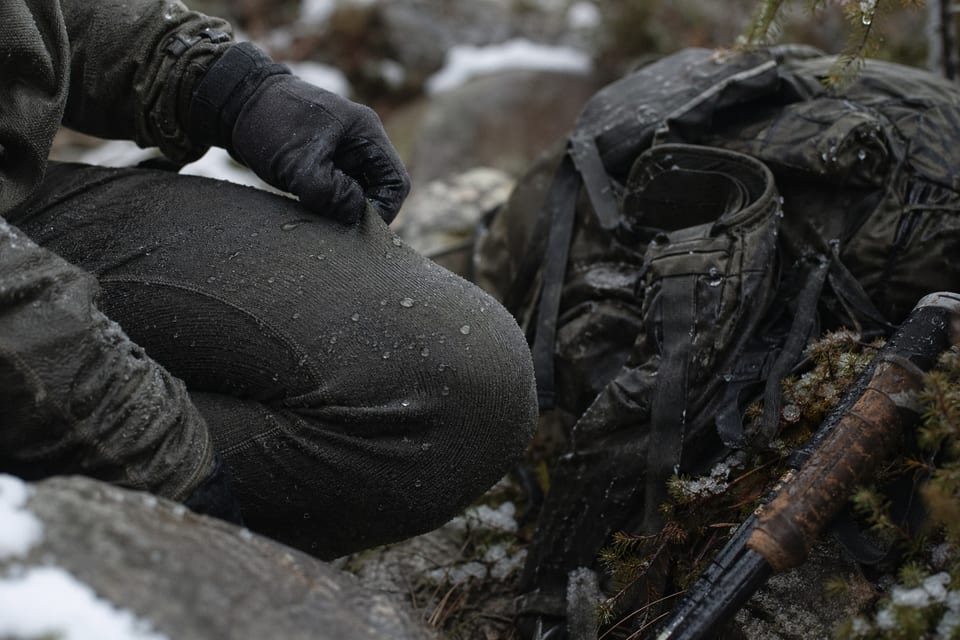
You might also want a pad or some sort of cloth to kneel on. It’s okay to do this on the bare ground; however, it can get uncomfortable quickly. Plus, when you’re kneeling, there might be rocks, sticks, and other things that dig into your skin. This will inevitably make your bow drill experience more difficult because of the discomfort.
Additionally, you’ll want to choose a kneeling pad made of fire-resistant material. It’s inevitable that your coals will burn a few holes in your pad. However, a bit of heat resistance can extend the lifespan a bit, ultimately saving you money and worry.
Now, you’re ready to get started.
Get Your Posture Right
The posture required for the bow drill method is a lot more involved than other fire-making methods. Start by kneeling down on the knee on your dominant side (if you’re right-handed, this will be your right knee). Lean your torso down on top of your thigh. Hold your dominant hand out (on the same side of the kneeling knee) for the bow.
Position Your Fireboard
Your fireboard should be lying flat on your pad or the ground. It needs to be on an even surface. This means you should remove any rocks, sticks, or other objects that may throw off the balance. You should then place the board underneath the foot on your non-dominant side. This is on the leg your torso is leaning on.
Because of how you need to position yourself and the board for the bow drill technique, you need to make sure the drill hole lies on the inside of your non-dominant leg. So, for example, imagine you’re right-handed. Your left foot will hold the fireboard down. This means the drill hole should be on the right side of your foot.
Place the Spindle in the Bowstring
Place the spindle perpendicularly directly against the bowstring. While placing pressure against the bowstring, begin turning the spindle until it’s diagonal to the bowstring. Catch one half of the spindle on one side of the bowstring and twist quickly. This will create a tension loop to hold your spindle in place.
This is one of the more difficult steps of bow drill fire-making. You’ve got to be smart about how you prepare your bow and the type of wood you use. If it’s not flexible enough, you’ll have a hard time inserting your spindle.
Position Your Palm Rock to Hold the Spindle in Place
The only way to ensure your spindle doesn’t pop out of the bowstring is to hold it in place with your palm rock. Until then, you’ll need to secure it with your hands. Place the spindle in your preferred hole on the fireboard and position the top of the spindle in the indentation of your palm rock. Your palm rock should be in your non-dominant hand.
Position Your Fire Bow
Now that your spindle and palm rock are in place, it’s time to start making fire! Hold your bow in your dominant hand. People vary in where they prefer to grasp their fire bow. For instance, some prefer to hold it in the center. Others like keeping their hand near the bottom. Just make sure the balance is right for you.
Brace Your Arm with the Palm Rock Against Your Shin
This is an important step. Not everyone needs to do this, but it does help, especially if you’re a beginner. Bracing your arm this way will ensure that your rock’s not wobbling all over the place as you bow.
Begin Drilling
Using a balanced, rhythmic motion, pull and push your fire bow back and forth. Be mindful that you’re not doing a “sailboat” motion, meaning your bow is moving up and down as a boat rocks with ocean waves. Instead, keep it straight and parallel to the ground. Don’t go too slow, or you won’t build up enough heat.
Make a Coal
If you’ve got the right balance of speed and pressure, the friction between the spindle and board will build up enough “punk” (that’s what we called the black powdery substance made by the wood’s friction where I was taught) to make a coal. Let it collect at the bottom of the hole to form a strong structure and retain heat.
Pick Up Your Coal
Pay attention to your coal’s development. Once it starts giving off lots of smoke, it’s ready to be blown into flame. You’ll also notice that even the slightest breeze will trigger a bright red glow from the coal, which means it’s live. Pick up the coal from the ground or pad very gently, and place it into your kindling nest.
This is another reason why you might want to bow on top of a pad. Picking up a live coal from the ground is a nightmare. You can easily break it. On the other hand, you can slip something like paper or a thin piece of bark underneath a coal on a pad and it’ll stay intact.
Blow It Into Flame
Nestle your coal into the center of your kindling nest. Pick up and place it about one foot away from your face. Blow very gently onto the coal, angling the nest slightly upward to keep the smoke from overwhelming you. As more smoke develops, blow just a bit harder. Your flame should ignite in about a minute or so.
2. Hand Drill Method
I find hand drill to be more difficult than the bow drill technique. However, some people may find that it comes far more naturally to them. Plus, the hand drill technique allows you to sit down comfortably and relax while you make a fire. This might be preferable to those who find it uncomfortable or painful to kneel down on their knees.
You’ll only need your fireboard and a spindle that matches the dimensions mentioned earlier for hand drill. Once you have these kit pieces, follow these steps:
- Place the spindle between the bases of your palms.
- Position the spindle in the desired hole on your fireboard.
- Press down on the spindle while maintaining the grip between your two palms.
- Move your palms back and forth opposite each other, spinning the spindle between them.
- Do this until a coal forms.
3. Plow Technique
Many people I learned to make fire with regarded the plow method as the most difficult, by far. In fact, those who accomplished it were celebrated and rewarded. Some folks even created a tandem method of the plow technique, which was seen as an even more impressive achievement.
On that note, you may have noticed that the plow method was not mentioned in the earlier sections where you learned to put your kit together. This is because this technique requires slightly different materials.
You’ll still need a fireboard. However, you won’t be making a hole. Instead, you’ll be essentially “digging” a groove into the board’s face using friction from your drilling piece. You can prepare the board ahead of time by smoothing out the face and carving a trench into the center of the surface.
Your plow piece should be about 18″ long and 2″ wide. Poplar and willow are good types of softwood to consider. Sharpen the end of your plow and make your coal following these steps:
- Place your board flat on an even surface.
- Position the plow on the part of the trench closest to you.
- Push and pull the plow while pressing down to build up heat.
- Do this until a coal forms at the top of the trench.
Note: As the trench and punk start to smoke, plow faster and with more force. This will ensure your coal is nice and ready for a flame.
Conclusion
Learning how to start a fire with sticks is a great way to get back in tune with the natural world. I hold the practice close to my heart. Ever since I learned how to do it, it’s been my preferred technique for making fire while backpacking. It allows me to fully escape into the wilderness and feel at home on this beautiful earth. Hopefully, this guide will help you do the same.
FAQs
Here are the answers to the most common questions when it comes to starting a fire with sticks.
How long does it take to start fire with sticks?
The speed at which you make fire with sticks depends on your experience level. Pros will only take a few seconds. Beginners can take a few minutes. Sometimes, you might not get a coal at all.
What household items can you use to start a fire?
550 paracord is often used to make the bowstring for a bow drill fire. If you’re making a flint and steel fire, land your sparks on a piece of cloth like an old rag or part of a shirt.
How do you start a fire with just wood?
Common methods to make a fire using only wood include the bow drill, hand drill, and plow techniques. I find the bow drill to be the easiest, although hand drill might be the most comfortable.
What rocks will spark?
In my experience, flint, quartz, chert, and obsidian are the best rocks to use for making sparks with the flint and steel technique. Generally, you just need to make sure that it’s harder than the steel.
What is the best wood for starting a friction fire?
There are many suitable wood types for a friction fire. Juniper, willow, and sagebrush are some of the most common. You’re mainly looking for softwood without sap. Hardwood is difficult to make coals with and any sap will cool down the punk and fireboard.
How do you start a friction fire?
There are many ways to start a friction fire. As mentioned above, the main techniques include bow drill, hand drill, and plow.
The first two techniques require spinning a spindle on a fireboard under pressure to build up punk and make a coal. The third requires creating friction between a plow and a trench on the fireboard to make a coal.