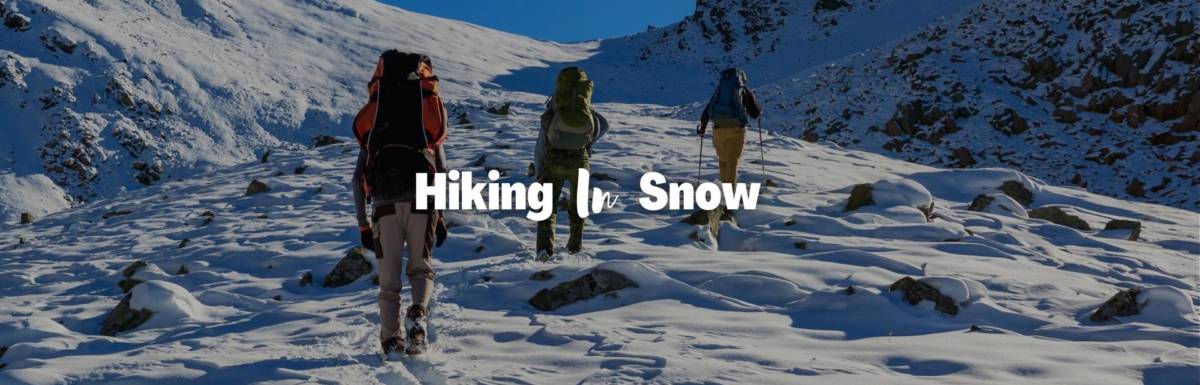

Just because the weather has turned cold doesn’t mean you have to stop hiking in the snow! There are many advantages to hiking in frigid weather. There are also a few additional steps to ensure your comfort and safety when hiking in the cold. Keep reading to discover the ultimate guide to cold weather hiking!
Share This Image On Your Site
<a href="https://outforia.com/cold-weather-hiking/"><img style="width:100%;" src="https://outforia.com/wp-content/uploads/2022/01/Cold-weather-hiking-infographics-01122022.png"></a><br>Cold weather hiking Infographic by <a href="https://outforia.com">Outforia</a>The Joy of Hiking in Winter

Just like a fresh blanket of snow completely transforms your neighborhood, hiking in the winter can be a completely new experience. Snow and ice create entirely new views on your favorite trails. Popular summer trails often become less crowded, allowing you to take your time and have the experience all to yourself without competing with crowds.
Different animals and birds are active during the winter, giving a fresh perspective to your favorite landscapes and creating even more to enjoy on a fresh trail. Hiking in the cold weather can be a challenge, but is definitely worth the effort.
You May Also Like: The Basics of Winter Camping – Learn How to Stay Warm When Camping in the Snow
How Is Hiking Different in Cold Weather

Checking the weather and trail conditions before setting out is an important step to prepare for your hike all year round, but is especially essential when hiking in winter. Checking the weather forecast allows you to prepare for the temperature, precipitation, and wind conditions.
Checking trail conditions before leaving can ensure you have the correct gear. Knowing in advance if you’ll be hiking through heavy snow or slick trails allows you to bring the correct traction gear, and checking avalanche conditions in advance will help you be safer while you’re out on the trail.
Online trail management sites are a good place to start, and you can even check information on nearby ski resorts to get an accurate idea of snowpack and avalanche potential.
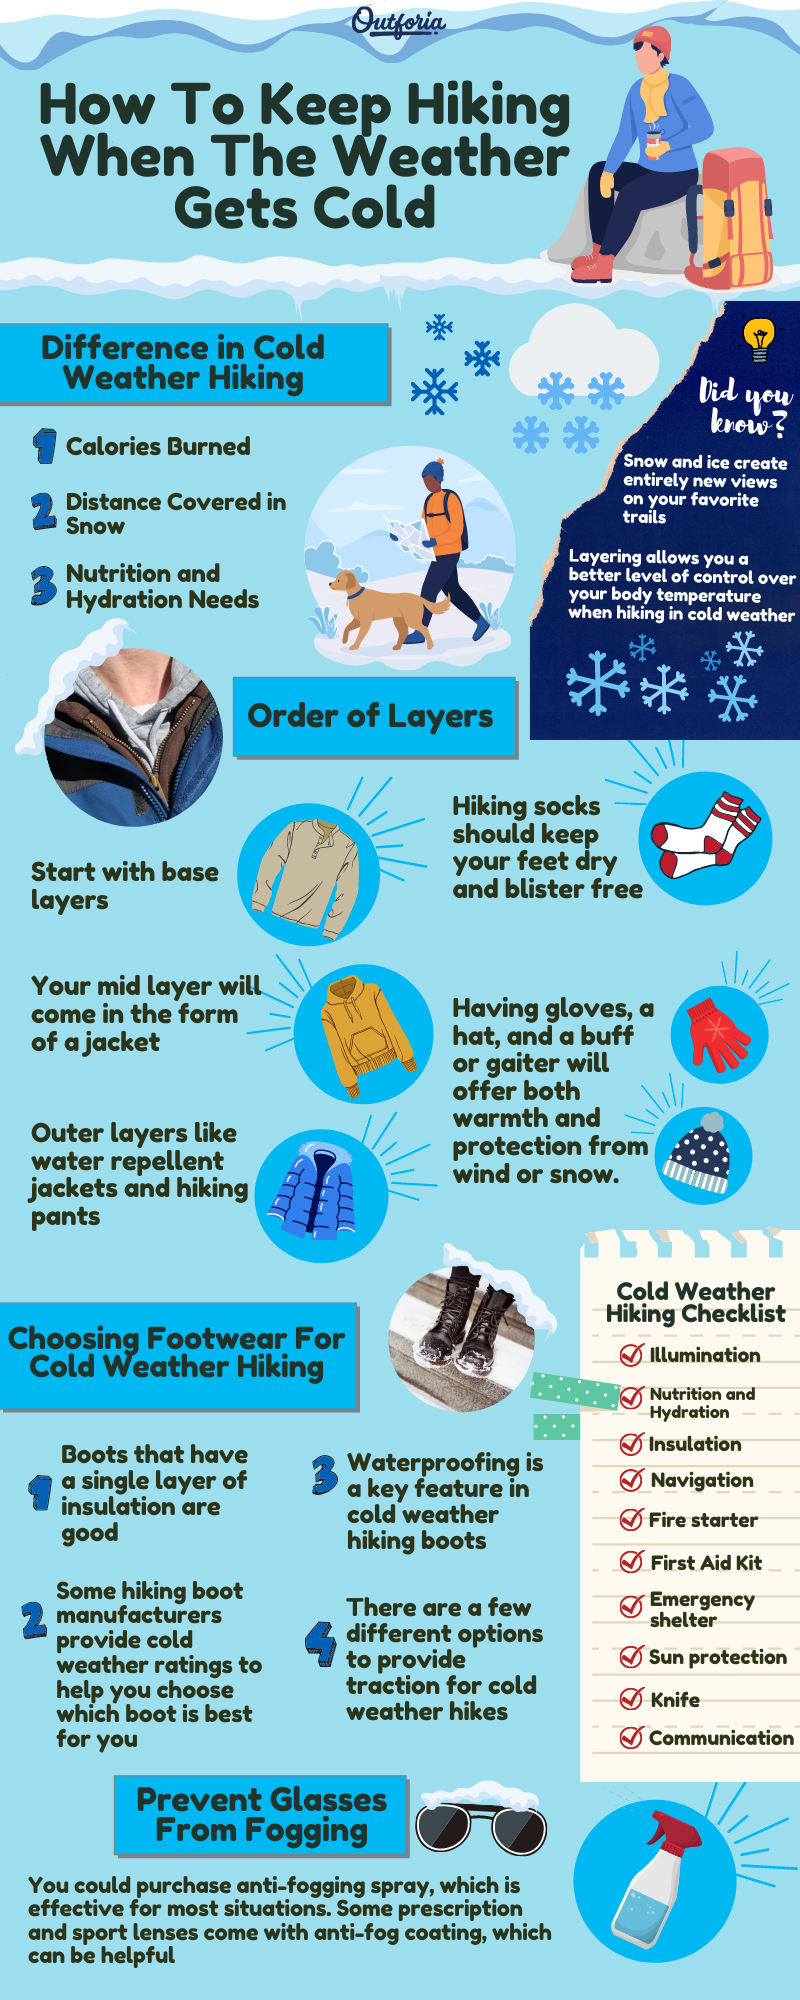
Calories Burned
Hiking in snow requires more clothing layers, heavier boots, and extra gear in your pack. It can also be more physically challenging to forge paths through deep snow or icy conditions. Because of these factors, studies have shown you’ll actually burn more calories hiking in colder temperatures.
Distance Covered in Snow
With a heavier pack and more challenging terrain, you’ll likely cover 50-75% of the distance in the winter compared to your usual summer hikes. The difference in distance depends on trail conditions and can be slowed by deep snow and icy conditions. If you’re hiking in deep snow, it takes time and energy to break the trail and cover ground.
Nutrition and Hydration Needs
Since hiking burns more calories, you’ll want to be sure to bring additional nutrition. Snacks that are high in calories and easy to eat on the go make refueling easy in the cold. Popular choices include nuts, protein bars, energy gels, and even gummy candies. Sandwiches and fruit are effective fuels as well.
Whatever you choose, keeping food in jacket pockets will prevent freezing. If you’ll be out for the whole day, soup in an insulated thermos can be a good choice.
Cold air usually means dry air, leading to dehydration faster than warm, humid hikes would. Be sure to carry more water than you think you’ll need. Hydration bladders are a good choice on any hike, but can make it easier to carry a higher volume of water in the winter.
To stop the mouthpiece and hose from icing up, take a few precautionary steps: fill the bladder with warm water, keep excess hose inside your pack, take small sips often to keep water moving (and to keep yourself hydrated), and blow air back into the hose to prevent ice blocking your water supply. You can also throw a few chemical hand warmers into the same pocket as your hydration bladder.
You May Also Like: Discover These 11 Best Winter Camp Destinations For Your Next Adventure with Photos, Guide, Facts, and more!
Proper Apparel for Winter Hiking

One of the best steps you can take to have a successful winter hike is to bring the proper apparel. From outerwear to footwear and all the layers in between, we’ve rounded up the essential steps to stay warm and dry during your cold weather hike.
The Benefits of Layering
Layering allows you a better level of control over your body temperature when hiking in cold weather. By adding and removing layers of clothing when necessary, you can prevent both overheating and getting too cold to really enjoy the hike.
You can also address any weather conditions that may come up while you’re out on the trail. Being prepared for snow and wind before leaving will keep you safe and allow you to enjoy the hike longer!
We’ll use base, mid, and outer layers to provide the right warmth and weather protection for your cold weather hike. We’ve described the essentials of layering for cold weather hiking here, but for everything you need to know on layering you can check out our Guide to Layering.
How To Layer for Warmth
Use the base, mid, and outer layers described below as your starting point. Keeping all three layers with you will make sure you’re ready to handle whatever the day may bring. You might start with the mid or outer layer in your backpack, but it’s better to have an extra coat you don’t need instead of freezing without it!
“Be bold, start cold” is a popular reminder for skiing, snowboarding, and winter hiking. Before you get started with physical activity in the winter, you’ll probably feel pretty chilly and will want to bundle up. However, if you’ve layered well it won’t take long to warm up once you get moving.
Order of Layers
We’ll start with base layers. The purpose of base layers is to wick sweat away from your skin, keeping you both dry and warm. For cold weather base layers, you’ll likely need both long sleeved shirts and long underwear. Base layers can be made from synthetic materials like polyester or spandex or natural materials like merino wool.
When choosing a base layer, pick clothing that has a snug fit to take full advantage of sweat wicking and prevent chafing. A soggy base is the last thing you want to be dealing with in the middle of a hike, so avoid cotton base layers.
Mid layers provide insulation to help retain body heat and are essential for cold weather hiking. Your mid layer will come in the form of a jacket, with the general idea that thicker or puffier jackets will offer more warmth. Depending on the temperatures and activity level, your mid layer could be as simple as a fleece jacket or as extensive as a puffy, insulated jacket.
Outer layers provide protection from the elements. Sometimes called a shell, this layer is waterproof and wind-resistant. Since you’ve already prepped your base layer and mid layer, the outer layer or shell doesn’t have to be insulated and instead focuses on keeping the warmth in and any moisture or wind out.
Look for water repellent jackets and hiking pants to prepare yourself for any weather conditions. In the coldest of weather insulated pants might be required, but may be too warm for some hiking trips.
All year round, hiking socks should keep your feet dry and blister free. In the winter, we’ll add warmth as another necessary function of your hiking socks. Similar to base layers, winter hiking socks can be made from synthetic or natural materials. Effective hiking socks for winter adventures should be breathable, moisture-wicking, and warm.

Finally, we’ll protect any exposed skin from the elements. Having gloves, a hat, and a buff or gaiter will offer both warmth and protection from wind or snow. Bringing two pairs of each item at different levels of warmth will help you regulate your body temperature throughout the day while also making sure you stay nice and dry, whatever the weather may be.
If you do get sweaty, keep in mind that moisture will quickly turn to a chill when you stop moving to take a break. The sweat will also freeze depending on how cold the weather actually is. Keeping a few extra basics in your bag will allow you to switch clothing for dryer options when needed.
Start with a second hat, buff or gaiter, and backup pairs of gloves and socks. Depending on the length of your hike you might also want fresh base layers in your pack to keep you dry and warm.
You May Also Like: Heated Socks vs Heated Insoles – What Works Better?
How To Choose Footwear For Cold Weather Hiking

Hiking boots that work well for cold weather hiking have some similarities to hiking boots worn in other weather conditions. They should be fit well and be comfortable enough to wear all day without getting blisters. Hiking in cold weather requires a few additional features for your boots to perform at their best. Insulation, waterproofing, and traction all play key roles in effective hiking boots in cold weather.
Insulation
Boots that have a single layer of insulation are good for basic cold weather hikes, while double-layer insulation is useful for extreme hiking and winter camping. Insulation in hiking boots is measured by grams, with 400 to 800 grams of insulation recommended for cold weather hiking. Thinsulate, wool, Zylex, and polypropylene are all common materials used to insulate hiking boots for cold weather.
Cold Weather Ratings
Some hiking boot manufacturers provide cold weather ratings to help you choose which boot is best for you. Generally given as a temperature range, comparing the cold weather ratings to the types of conditions you anticipate hiking in can narrow down your search for cold weather hiking boots. Keep in mind that this rating is often an estimate and can be improved with the socks you choose.
Waterproof
Waterproofing is a key feature in cold weather hiking boots. Keeping snow and other moisture out of your boots will help you stay more comfortable and dry throughout the hike. Most insulated hiking boots are also waterproof, so you’ll likely be able to cover both necessities at once. Look for hiking boots with lowers made from rubber or waterproof synthetics for the best protection from snow.
Traction
There are a few different options to provide traction for cold weather hikes. Microspikes or mini-crampons are useful on level hiking trails that are covered with packed snow and ice. They slide on over the soles of your hiking boots to provide a little more grip on slick surfaces.
For steeper trails, crampons may be more useful. Crampons have longer and sharper spikes, allowing for better grip to hold onto thicker ice.
Whichever traction method you choose, knowing when to use it can make a big difference. Microspikes and crampons add more weight to your boots, wearing you out faster than hiking without them.
Experience hiking in cold weather and knowing the traction limits of your winter hiking boots will help you make the most of your trip while still staying safe in slick conditions.
You May Also Like: Is Thinsulate For You? Check the Comparison Between 400 Grams and 800 Grams of Thinsulate in Winter Hiking Boots
What To Bring In Daypack for Cold Weather Hiking

As with any hike, start with the ten essentials. Then we’ll add a few specialty items designed to keep you safe and comfortable in cold weather.
Bring at least one flashlight or headlamp, with extra batteries. Cold weather saps battery power faster, so keeping your illumination in an interior jacket pocket is a good idea.
Bring plenty of water and snacks to combat the dry air and additional calories burnt in the cold. Again we’re looking at a risk of freezing, so store a few snacks in interior jacket pockets and use the tips outlined in this article to prevent your water from freezing.
Layers in all three categories will keep you warm and prepared if the weather takes a turn for the worse. Bring a few pairs of gloves, socks, hats, and gaiters of different weights to adjust layers as needed and provide dry options throughout the day.
A GPS unit (smartphone or handheld GPS) or even a physical map of the area is essential for hiking regardless of the weather.
Simple firestarter kits will help you stay warm should you be out on the trail longer than expected and should be carrier year round.
Even if you’re traveling a high traffic trail, a first aid kit is essential at all times.
Another essential regardless of the weather, an emergency shelter should always be stowed in your pack. For hiking in snow, add an emergency blanket just to be safe.
You might think of sunscreen as a summer-only need, but sun protection is a year-round must. Sunscreen, sun glasses, and lip balm with SPF should all have a permanent place in your hiking pack. Even on overcast winter days, the reflection from the snow makes sun protection a necessity. Snow blindness, or photokeratitis, is a condition that occurs when your eyes absorb too many UV rays. To prevent this, always have UV filtering sunglasses with you when hiking in the snow.
A knife can help you get out of a multitude of sticky situations in the backcountry, from fire building to first aid to simply cutting an apple for a snack. Keeping a knife tucked away in your hiking pack is always a good idea.
Keep in mind where you’ll be hiking and what reception might be like to choose the best communication for you. Satellite phones, emergency radios, and even just your cell phone can all be good choices depending on your location.
You May Also Like: The Other 15 Must-Bring Hiking Backpack Essentials For A Stress-Free Hike Trip
While the ten essentials will cover most of your hiking needs year-round, there are a few additional things you can bring to make your winter hiking trip both more enjoyable and safe.
- Chemical hand warmers can be placed in pockets to not only keep your hands warm, but to also keep electronics charged and prevent food from freezing. Chemical hand warmers can also keep your water supply liquid for longer.
2. Trekking poles are another gear item to consider in the winter. They can provide more
traction on slippery trails and prevent you from tiring too quickly.
You May Also Like: Why Use Trekking Poles? Learn the Pros & Cons and 5 Tips to Help You Use It like a Pro!
How To Prevent Glasses From Fogging In Cold Weather Hiking

If you’re an avid hiker with prescription lenses or any hiker out on a sunny day, foggy glasses are a common cold weather complaint. Your gaiter or even jacket collar can push the warm air of your breath straight up to your frames, causing instant fogging. Even just the warmth of your skin in cold temperatures can be enough of a temperature difference from the air to cause fog.
You could purchase anti-fogging spray, which is effective for most situations. Some prescription and sport lenses come with anti-fog coating, which can be helpful. Ultimately, the shape of your frame and lenses can have the biggest impact on fogging. Smaller, flat lenses trap less air and become less foggy than curved, wrap-around lenses.
If all else fails, throw a cleaning cloth in your pocket that is easily accessible to clear your lenses when needed.